Website Integration
Your website account ties to your Minecraft character so the browser can show the same progress you have in-game — and let you act on many things without typing commands. One link works for Survival and Skyblock; switch realms on the dashboard when you change servers.
What You Need
- A free account on this site (register / log in).
- Your Minecraft character joined on Survival at least once so you can read your linking code.
- For live inventory moves, claim changes from the web, and similar: stay online on Survival while you use the site—the server applies the same rules as in-game tools.
Link Your Character
Your scoreboard shows a short HyperCode. Enter that code on the website to connect your Minecraft character to HyperCore (the account system).
- 1. Log in on the website.
- 2. Join Survival and look at your scoreboard for the short HyperCode.
- 3. Open Link Minecraft account, enter the code, and confirm.
After linking, Survival sidebar tools unlock (claims, inventory, warps, shops, auction house). Switch to Skyblock on the dashboard for island pages. Until linked you only see Link Minecraft account under Account.
Survival vs Skyblock on the Site
Use the Survival | Skyblock toggle on your dashboard to change which server the website shows. Each realm has its own inventory sync, stats, and sidebar pages — they do not mix coins with Scoins or Survival claims with island bank.
- Survival — homes, player warps, claims, MLS, shops, auction house, inventory & Ender.
- Skyblock — island overview, bank, members, missions, upgrades, settings, warps, biomes, top islands, inventory & Ender.
Profile & Dashboard
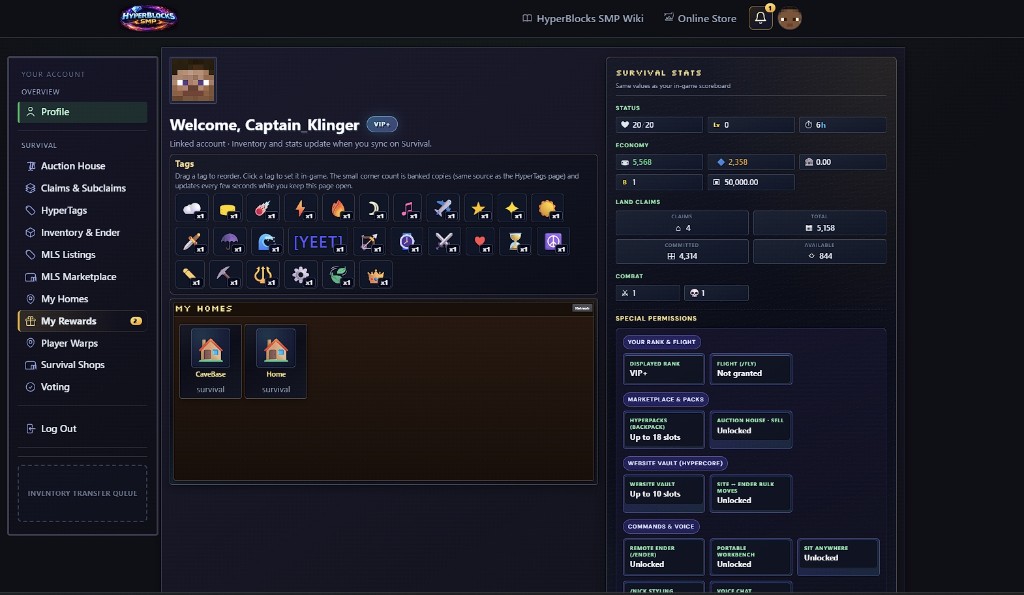
Profile is your home base: rank and other play-facing info is kept consistent with what the network knows about you. Use it together with the sections below.
Inventory, Ender Chest & Website Storage
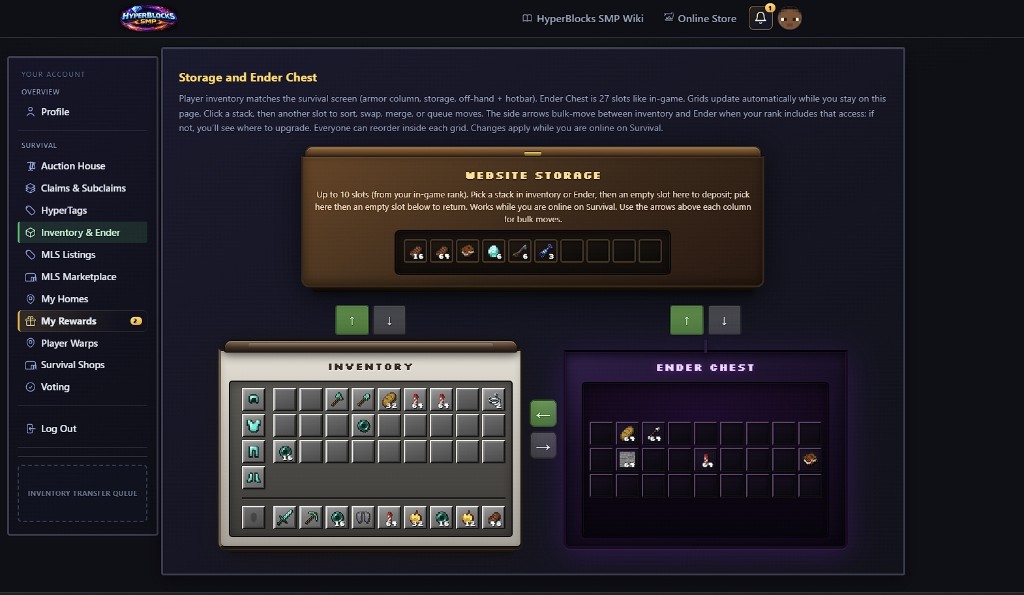
Open Inventory & Ender after linking. While you are online on Survival, your hotbar, inventory, and Ender Chest stay aligned with the server—you can sort items, move stacks between columns, and use column bulk controls where your rank allows.
Website Storage appears as extra slots (count depends on rank): pick a stack in inventory or Ender, then an empty web slot to deposit; pick a web stack, then an empty slot below to pull items back. Treat it like an extension of your character, not a separate cloud save—permissions and limits match in-game behavior.
List to Auction House: Click an item on Inventory, Ender, or Website Storage, then choose Buy It Now, Auction, or Auction + BIN. Stay online on Survival so the listing can post. Details: Auction House in the Browser.
Claims & MLS in the Browser
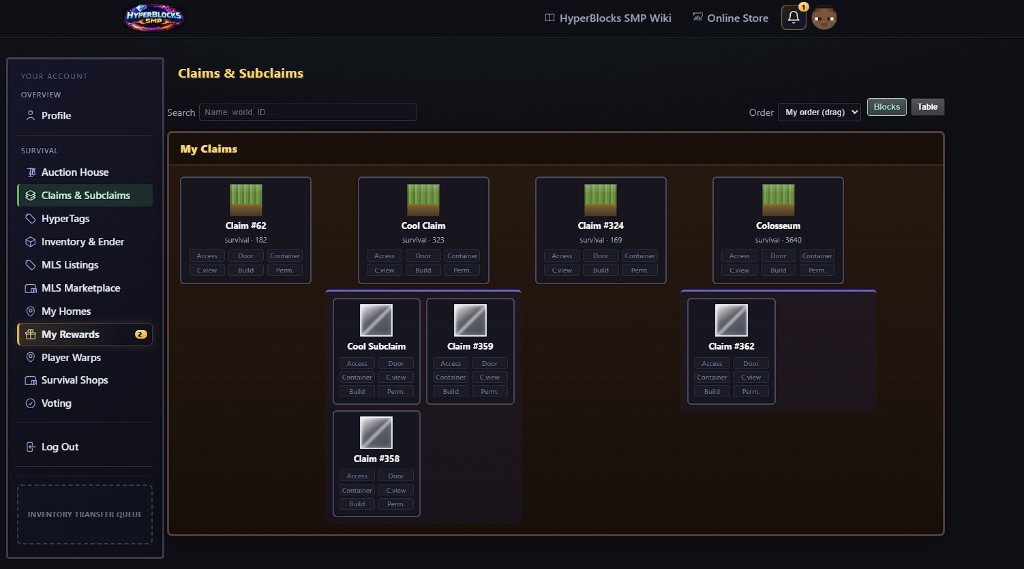
- Claims Overview and All Claims & Subclaims list everything you own or rent; open a row for detail pages (trust, settings, teleports) where the claim system allows web actions.
- Your MLS Listings and MLS Marketplace mirror the in-game marketplace so you can review or manage listings from a browser.
The sidebar note is accurate: claim and MLS data reflect your last Survival sync; changes you submit from the site are applied while you are online when the server accepts them.
Player Warps
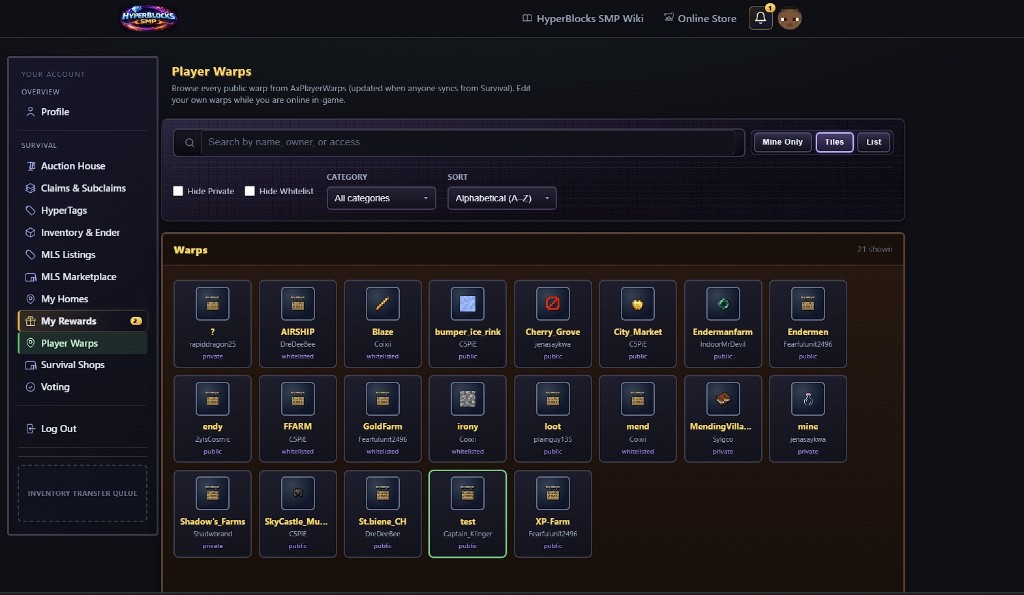
After linking, open Player Warps to browse public warps and manage your own when you are online on Survival.
Rewards
Use Rewards (or the Rewards section in the account sidebar) for milestones, playtime, dailies, weeklies, and streaks. Claiming from the web delivers to Survival when the server is reachable—being online helps reliability.
Boards (Leaderboards)
Open Boards for the same standings you see in-game. Survival includes Crop of the Month — harvest potatoes, carrots, wheat, melon, cactus, or bamboo to climb this month’s featured crop. You can show on those farming boards as soon as you start harvesting. More than three days away from Survival and you come off; play more than an hour after you return and you can climb back.
Stay on top kill leaders, top coins, top gems, and top bank balances by playing Survival — more than seven days away and you come off. Those scores are always saved. Top all-time playtime and deaths boards keep their own standings.
Auction House in the Browser
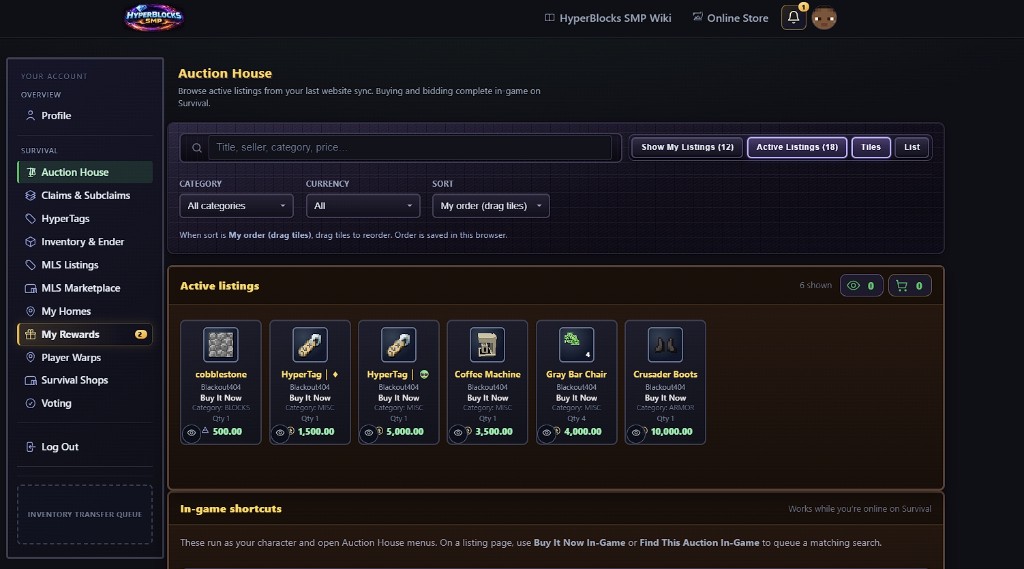
After your character is linked, open the site’s Auction House to browse listings that stay in sync with Survival. You can also create listings from Inventory, Ender Chest, or Website Storage. Stay online on Survival when you bid, buy, or list from the site — those actions finish in-game as your character.
Three listing types
Every listing is one of these (same labels in-game and on the site):
- Buy It Now — a set price; buyers pay that amount (in-game command type:
Fixed). On the website, confirm the item, then finish checkout while online on Survival. - Auction — starting bid only; buyers raise the price until time runs out (no instant buyout). On the website, open a listing and use Place Your Bid.
- Auction + BIN — starting bid and a Buy It Now price (must be higher than the start). In-game this is also called Auction Plus /
AuctionBIN. You can bid or buy out when a buyout is set.
How to list from the website
- Open Inventory & Ender (or Website Storage on that page) while linked and online on Survival.
- Click the item you want to sell.
- Choose Buy It Now, Auction, or Auction + BIN, enter the price(s), and confirm.
- The listing appears in the Auction House (website and
/ah) like any other sale.
You can still list in-game with /ah sell (sell menu or typed Fixed / Auction / AuctionBIN) — full command list on the commands page.
Buy Orders
Buy Orders are how players post what they want to buy. Open them in-game with /ah orders / /buyorders, Hyper Menu → Exchange, or the Buy Orders board at the Auction House. Create an order (item, amount, price), or fill someone else’s. Selling with /sell can fill matching Buy Orders first when the price beats live Wholesale. Details: Commands → Warps, Trading, and Auction.
Placing a Bid on the Website
- Enter your next bid amount (the site shows the minimum next bid when available).
- Stay online on Survival so the bid can complete.
- Maximum Bid (optional, VIP and up): set a ceiling and the server can raise for you automatically when others outbid you, up to that amount. Without a rank that includes this perk, Maximum Bid stays locked and links to the Store.
In-game you can also use /ahautobid for the same Auto-Bid perk — see Commands → Warps, Trading, and Auction.
Listing names
On this website Auction House, listing titles use title case (major words capitalized) so names are easier to scan in the grid and on listing detail.
Managing listings, Auto-Relist, and Priority Listing
In-game, /ah list shows your active listings with delist tokens; /ah delist <token> takes one down. VIP and up: toggle Auto-Relist from the website when that control is shown, or use the in-game clicks described on the commands page (Middle-click on the main /ah list, or Shift+Right-click in Your Listings).
Priority Listing is in-game only: on your listing, Shift + Left-click pays 500 coins to boost that sale toward the top of the Auction House for 30 minutes (you can boost again to extend). Full click table and details: Commands → Warps, Trading, and Auction. Rank limits: Ranks comparison.
Skyblock Dashboard Pages
After linking, switch the site to Skyblock and use the sidebar:
- Island — level, worth, team summary.
- Bank — move Scoins between your wallet and the island treasury.
- Members — invite, kick, or change roles (online players only for invites).
- Missions — track categories and claim rewards from the browser.
- Upgrades — view and purchase island upgrades when you meet requirements.
- Settings — toggle island flags (visitors, mob spawn, growth, and similar).
- Warps & biomes — manage island warps and biome changes.
- Top islands — network leaderboard.
- Inventory & Ender — same live sync idea as Survival, but for Skyblock while you are online there.
Actions you start on the web queue to the Skyblock server — stay online on Skyblock for the fastest results.
Survival Transporter (Skyblock → Survival)
Member rank and higher unlock a one-way bridge on the Skyblock inventory page: move one stack from Skyblock into your Survival website storage. Higher ranks get more moves per time window. It does not send items the other direction — use normal gameplay or website storage to move Survival items.
Quick Link from Chat
On Survival, run /website to receive a message with a clickable link back here—handy on Bedrock or when you do not want to type the URL.
Tips
- Use a normal browser (desktop or mobile); you do not install a separate “web client”—it is the same HTTPS site as the rest of HyperBlocks.
- If something does not update, confirm you are on Survival (not another backend) and still connected; then refresh the page.
- Staff workflows use the same account app in management mode; this page is written for players.